
 |
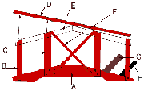 Left Side |
 Right Side |
|
|
| Left Side |
Right Side |
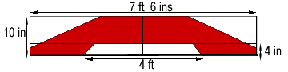
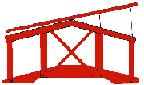
| Next fit
cross rails using sections "F" Place into position and mark both pieces where they cross. Here comes the tricky part. In between marks, cut and remove wood to half the thickness of the wood on both pieces.This will allow both sections to interlock making the cross you require. |
| Side
view |
Top
view |
| Next
Fit top side rails using section "E" Work from top centre out to each side and fix into position. Once fixed into position you will need to plane the top until level with top hand rail. This will give you a nice neat finish to the top. Next Fit foot boards using sections "G" It's up to the individual as to what gap is left between foot boards. Use 2 inch Screws |
|
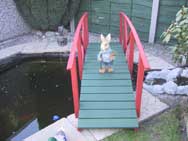
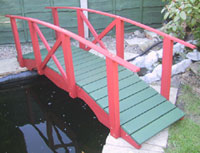
I used red wood stain for the bridge and green wood stain for the foot boards |
 |
| Pond Construction | Waterfall Construction | Pumps / Filters Ultra Violet Clarifiers |
Pond Plants |
| Choosing Your Fish | Fish Diseases | Site Guide | Links |
| Preparing
For Winter |
Koi Varieties | Place A Picture Of Your Koi Pond |
Awards |
| Search Engines | Play Free Games | Fishing and Tackle Sites |
|
|
Return Home |
